How To Clean Insects
by Johan J Ingles-Le Nobel
Last updated August 31, 2017

It's one of those things that separates a great insect stack from a not so great stack - the beautifully clean insect. This doesn't usually happen by itself and there are various options available.
Clean Containers!
Specimen Preparation Walkthrough
1 ➤ The specimen preparation workflow
2 ➤ How to clean preserved specimens
3 ➤ How to relax specimens for spreading
4 ➤ How to make spread specimens for setting
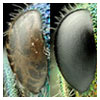
5 ➤ How to cure dehydrated eyes
6 ➤ How to dry a cured specimen fast
7a ➤ How to pin a cured specimen, or...
7b ➤ How to card a cured specimen
Other reading: focus stacking walkthrough
In nature, insects spend an inordinate amount of time beautifully cleaning their antennae and eyes. The biggest thing you can do to help yourself easily is to make absolutely sure that your insect container is scrupulously clean - the best cure is prevention. I wash mine in a wire mesh container in the dishwasher and run them through an ultrasonic cleaner first. Clean pots, with one specimen per pot, maximises their natural cleanliness.
Chemicals for Cleaning Insects
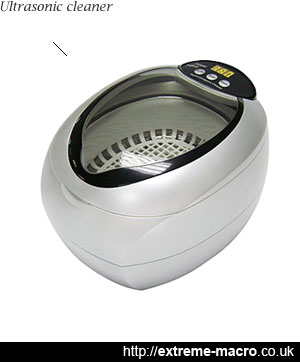
Consumer model ultrasonic bath, usually used for jewellery but convenient for cleaning insect specimens. The really cheap models are useless and you want to look for one that vibrates at a frequency of 25,000-40,000 Hz+. If you can find one with variable power get it - full power can break fly wings. Cost about £50+
We use a variety of chemicals in the insect preservation process and some of these have a bearing on the appearance of your final specimen. The main challenge that I've come across is the clumping or matting of insect hair on the insect specimen, and although various suggestions seem to make sense and look promising, there isn't a universally accepted solution that I'm aware of yet.
That said, it seems reasonable to suppose that hair clumping is caused by fats on the hair that are sticky, and successive cleansing rinses does ameliorate excessive clumping to a certain extent, but it is not entirely satisfactory.
Insect Baths
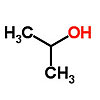
A soak in a warm water bath cleans insects well, especially if agitated slightly. This is gentler than an ultrasonic cleaner, use 99% Isopropanol afterwards to disperse the water and gently dry the specimen with a hair dryer on gentle heat from a distance. Or use a compressed air source if in a lab, but the key is to have a very very very gently air flow otherwise the specimen will be ruined.
An interesting addition to your arsenal of tools for cleaning specimens is Decon90, an anti-radiation decontaminant. Besides restoring insect eyes, Decon90 will also clean your preserved insect specimen, removing bits of grime, dirt, dust, fats etc.
Hardware for Cleaning Insects
Stereo Microscope
Perhaps the best way of cleaning a small insect but also probably the most tedious - using a stereo microscope with brushes and other custom made tools to clean your specimen, tedious particle by tedious particle. I usually spread the insect first and then use a trimmed watercolour brush to remove particles of dust and earth. As you can probably tell I don't consider this a whole ton of fun but with enough time and patience it does make for a perfectly clean specimen. Use a small tub to cover your specimen and prevent dust landing on there if you need to take a break.
Ultrasonic Cleaner
not bad but not perfect eitherUltrasonic cleaners are available on eBay in the £50+ price range, and do a good job on the more solid insects. Typically the process involves putting your specimen in a liquid, which is then agitated ultrasonically in the cleaner so that micro cavities form which dislodge dirt. They're not bad but not perfect either - extremely fragile components such as fly wings can become damaged in the process. Mine has a variable power and duration setting which is very convenient, as it allows for subtler use for more delicate specimens - the model is an "ultra 6050 ultrasonic cleaner". There may very well be better and cheaper around but it works for me.
Insect Shaker
A DIY alternative to buying an ultrasonic cleaner is to make your own insect shaker. You don't need much gear to do so although you do need to be comfortable with soldering electronics and Arduino. This device solves a couple of problems - it gently agitates the specimen (important because overvigorous cleaning ruins it), and it keeps the specimen submerged despite the tendency of dried out insects to float.
Lens Blower
The humble lens blower can do an excellent job of dislodging dust, hair and soil from your specimen, and costs almost nothing. Canned air lens cleaners are tempting but the air comes out at too fast a rate to really control it well. Beware of adding new dust onto your specimen - I keep one lens blower in a zip loc bag exclusively for this purpose and nothing else.
Insect Cleaning Tools
It's useful to build up and make your own set of tools to manipulate and clean insects. I have built mine up over the years and they're a lot more useful than products you can purchase.
- Small child's painting brushes with 90% hair removed used to manoeuvre the insect and pry off bits of dirt
- Small pins (minuten) on wooden handles (pencils) with the ends turned into tiny 3mm hooks used to pull apart minute joints
- Jewellers and horological tools are usually good places to look for tools to handle small insects.
- Craft tools usually have handy things too
Software
Lastly, the role of software to clean your macro stacks shouldn't be overlooked. Cloning or using the healing brush can make small bits of dirt disappear very effectively if used judiciously.
Insect Cleaning Downloads
Related Articles