Front Lighting
by Johan J Ingles-Le Nobel
Last updated August 31, 2017

One of the first things that people usually buy when they embark on their macro photography is a ringflash. Paradoxically, whilst easy to use, the standard ringflash probably produces the least interesting type of light.
Why You Want Front Lighting
single element ringflash probably produces the least interesting type of lightOf course you need some front lighting to illuminate the front of your subject: having a completely dark subject is no good. The need for some front lighting is therefore fairly obvious, but in particular it's the front lighting that will reach down into the crevasses that side lighting or rim lighting will never be able to reach. But beyond this though, front lighting also gives you a couple of problems.
Reflection

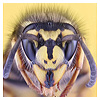
Frontal lighting using a ringflash. Ringflashes get a bad rap for having boring, uninteresting and undimensional flat lighting, but a sophisticated ringflash in the hands of a good photographer will give very bright, sparkly lighting that creates a great deal of pop. But, this is also largely due to choosing the right subject - this snipe fly has no metallic parts and doesn't reflect light, so there are no flash reflections that could spoil the pic.
Shiny things will reflect your light source straight back at you, and ringflash reflections are rarely considered appealing. The way round this is to use diffusion to wrap light around the subject so that the light source is divided over 180 degrees, and does not appear as a noticeable specular highlight, but appears as a white sheen all around.
But, again, reflection raises its head, this time the reflection of the lens. The lens is dark, and will create a dark spot in the centre of an extreme macro shot and there are only limited ways to get around this, most noticeable of which is light reflection off an angled slide cover, known as a beamsplitter or axial lighting (see below).
Flatness
Frontal lighting can make for a very flat photograph with little contrast. Better ringflashes available today allow for some variation between the output variation of the different parts of the ringflash and the purchase of one of those is recommended for future creative versatility over one that just illuminates uniformly over the entire ringflash. But if you're going to buy a ringflash look for a good one with large semi-toroidal flashtubes, not just two little flashes like pretend ringflashes.
Other Front Lighting Sources
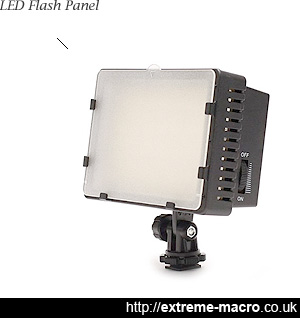
A good 128 LED video camera flash panel. But, of limited use in field macro, as continuous LED light will not freeze movement, and colour temperature is also regularly mentioned as an issue, especially mixing LEDs with electronic flash. However, for stacking early morning insects, they're a very good supplementary light source.
LEDs have become increasingly more powerful over recent years and there are now some perfectly good LED panels and LED ringflashes available for purchase. These look good, although the power output is still somewhat limited and the most successful use that I have seen from them is as extra side lighting rather than main light source.
The fact of the matter is that ring flashes will stop (freeze) movement whereas a continuous LED flash light will not, and not only that but colour temperature is also regularly mentioned as an issue with LED ring lights, especially mixing LEDs with electronic flash.
That said, for some branches of photography LED sources are the only available option (ie long wave fluorescence) and I have had perfectly good results by using those in combination with a camera that gives good results at high ISOs. The general rule with LEDs is the more LEDs the better: personally I have no doubt that given the pace of technological advancement within LEDs, it is only a matter of time before these become a truly viable continuous lighting macro tool.
Problematic Front Lighting
Front lighting in studio work is, in fact, frequently problematic because of the short working distance encountered. Removing the outer hood from a microscope objective can help, as can channeling light through fibre optic cabling. Some specialised microscope objectives also allow light to travel through the outer tube.
Axial Lighting
An interesting variant of front lighting is axial lighting, which is a technique used by microscopists and coin photographers. With axial lighting, the lightsource is placed at right angles to the object to be photographed, parallel to the sensor plane, but a sheet of optically clear glass (a beamsplitter) is between camera and subject, angled to reflect the light onto the subject. So yes, you're shooting through the glass. The reason for doing this is so that the light reflects onto the subject and more importantly, the reflection of the light from the subject just shows the light, not the black centre of the lens. Any surfaces that are perfectly flat and perpendicular to the sensor on the subject will show as light (because they reflect the light back), whereas other surfaces are a shade of dark. This creates very interesting edges and contours for coins.
The potential macro use for the axial lighting technique is obvious, and if the weather were to permit it I'd be trying it on snowflakes as well. I'm not sure how I would construct a macro rig that could have a beamsplitter in it for use with outside insect photography, but it doesn't sound too difficult so it might be something I'd make over the summer. There are other ways to minimise the black lens reflections though, for example you could always try double polarising. But my experience of this is that it creates quite a dead looking subject, very flatly lit, so a beamsplitter approach maybe more interesting.
Related Articles