Extreme Macro Lighting
by Johan J Ingles-Le Nobel
Last updated August 31, 2017

To make a great extreme macro photo, above all you need to get the lighting right. Omitting photography using a microscope, there are three types of lighting that extreme macro photography uses: flash, continuous and natural.
Flash Lighting
If properly used, flash gives superb results for extreme macroThe common criticism of flash lighting that it doesn't look natural only comes about by looking at bad flash photography. If properly used, flash gives superb results for extreme macro, mainly because the duration of the light is so short that sharpness ceases to be an issue. Furthermore it is convenient - a portable, rechargeable light source, so it can be used both in the extreme macro studio photography and field macro.
Learning to control and use the flash nicely rather than harshly involves a trial, error and experimentationBut, using flash is not without its challenges. Just using flash for the first time - be it a dedicated macro ringflash or a more generic large flash - involves quite the learning curve, as it is a world of strange unfamiliar flash settings such as manual mode, TTL and rear curtain sync. Learning to control and use the flash nicely rather than harshly involves a trial, error and experimentation. On top of that there are technical challenges that will throw you a curveball periodically, and on top of that, there are ways that work and yield results, and ways that don't.
Studio Macro: Continuous or Flash?
continuous lighting demands extreme stability in your setupSome extreme macro photographers swear by continuous lighting whereas others fly the strobist flash flag. I am one of the latter as my experience of using continuous lighting has always resulted in soft images. Fundamentally, continuous lighting demands extreme stability in your setup to the extent that cars passing by your house on the road should not vibrate your specimen by even a single pixel. Many people, myself included, lack such a vibration-free location and for those people flash should be your lighting of choice.
but if your stability is good enough, continuous lighting offers you extreme macro advantages that flash has difficulty matchingHowever, if your stability is good enough, continuous lighting in the minature studio does offer you extreme macro advantages that flash has difficulty matching. In particular, continuous lighting gives you a more targeted way to light your macro specimen, able to be angled and reach down into all the nooks and crannies of the hairs, which is very useful if your working distance is very short. At the budget end, Jansjo lights (by Ikea) give very nice continuous lighting, and at the top end, the use of fibre optic illumination from the microscope world comes into its own.
Natural Lighting
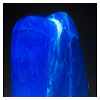
In the field, natural lighting is sometimes more than enoughIn the field, natural lighting is usually more than enough to come out with great extreme macro shots, especially by combining it with standard studio photography techniques such as reflectors, flags/gobos and beauty dishes. Where a boost is needed, both flash lighting and continuous lighting can be employed; LED light panels are a popular option. But this is for a boost, and sole reliance on cheap continuous lighting 'ringlights' as a main or only light tends to disappoint more often than not due to the insufficient light output which leads to long, unsharp exposure times.
The Importance Of Lighting
It is impossible to overstress just how important lighting is to the extreme macro photograph. Although there are no universal rules for what constitutes the best light, there is a world of difference between a bright, well lit specimen that pops, and an underexposed, dark, muddy 'something'. People underestimate its performance and wrongly spend hundreds of pounds buying a lens that's a little bit 'better', but 99% of the macro photographs that I judge lose points because of the lighting, not because of the lens. Understanding diffusion is key to extreme macro, as it is the method by which we tend to transport natural looking and even light to a subject.
Studio Techniques
world of studio portraiture has a lot of knowledge for the extreme macro worldThe world of studio portraiture has a lot of knowledge for the extreme macro world and their techniques are worth studying. Lighting is lighting, regardless of whether the specimen is six foot tall or a sixth of an inch, the ideas are the same. Many studio techniques used in portraiture and pertain to extreme macro and this world gives us a lot of tools to get our lighting right, including barn doors, beauty dishes, flags, reflectors, snoots, grids & gels. Direction of lighting is vital with extreme macro photography, and very different results are obtained by using back lighting (rim lighting), front lighting & side lighting.
Diffusion
Flash lighting that doesn't look natural is invariably due to the use of a small flash unit without diffusion, giving those horrible nasty specular highlights. The way to avoid this is the use of diffusers, which are cheap and easy to make yourself. All sorts of materials found around the home can be used, many of which are tested here, as are the various shapes we use and topics for further consideration. Diffusion is a vital yet easily misunderstood concept.
Backgrounds
One of the biggest differences between great macro and mediocre macro is paying attention to the background of an imageOne of the biggest differences between great macro and mediocre macro is paying attention to the background of an image. We've all seen macro shots that have a fussy, clashing background; they don't work very well and this applies both to field and studio photography. There are no exact rules for backgrounds as different things appeal to different people, but certain ideas work better than others for a nice, smooth, non-distracting background. For more advanced users, making gradients is also examined.
Macro UV Lighting
Extreme macro isn't just confined to visible light and there are some specialised UV techniques and lightsources that can help you see UV and fluorescence as well.
Related Articles