Photoshop Levels
by Johan J Ingles-Le Nobel
Last updated August 31, 2017

The Photoshop levels tool is one of those superb inbuilt Photoshop tools that once you understand the use of it to alter the light in your image, you wonder how you ever managed to do without it.
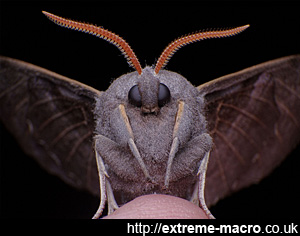
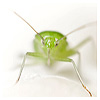
Image before using Photoshop levels.
The image isn't too bad but it's a bit on the dark side.
It lacks a bit of punch and the outline of the wings at the back are unclear against the black background.
Could do better.
Light
Light doesn't always reach where we want it to, in the quantities we want. Darks can be too dark and there can be a grey fog across an image because of stray light. This is where the Photoshop levels tool comes in. The levels tool makes adjustment extremely easy.
Levels For Photography
Using the levels tool is exceptionally easy and the controls are all built in. Basically the process is to find the darkest and lightest area in your image using droppers, then creating an adjustment layer which shows the adjusted levels. For photography, it's worth adjusting the extremities slightly to retain some detail in both the darks and the lights.
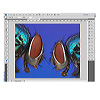
- In open image, choose Image ›› Adjustments ›› Levels. Double click the white point eyedropper (the one painted white, usually on the right).
- Set 245 in each of the RGB values in the colour picker that comes up. This establishes the upper tone of our image as something slightly short of pure white, in other words still showing a little detail.
- Repeat process with the dark point eyedropper, and set each value as 10.
- Photoshop asks if you want to keep these values, choose yes.
- Open a threshold adjustment layer.
- In the threshold dialogue box that has appeared, mark the lightest (1) and darkest (2) points in your image by using shift and the eyedropper tool. Remove threshold adjustment layer by deleting or hiding.
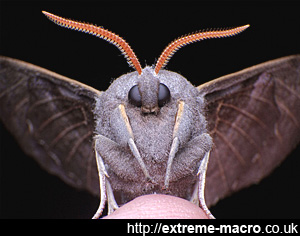
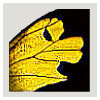
Image after using Photoshop levels.
A 5 minute exercise, the image has a ton more pop and the wings at the back are a lot clearer.
Not altogether too shabby.
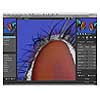
- Open levels adjustment layer and use white eyedropper to click on (1) and the black one to click on (2).
- What this then does is say that the lightest part of your image should be 245 and the darkest 10, even if in the original image the tonal range was far less.
- Hover over and adjust the arrow sliders underneath the levels histogram to taste, including the output levels sliders.
The Curves Tool
The Photoshop curves tool does a similar thing and many Photoshop beginners use that first. For me though the curves tool works better as a way to adjust contrast between the peripheries. But by using the curves and levels tool together, complete control can be taken over the tones in your image.
Levels Downloads
Related Articles