The Gradient Background
by Johan J Ingles-Le Nobel
Last updated August 31, 2017

A gradient background, and especially a multiple colour gradient background, can make the dullest extreme macro image stand out from the crowd, but be careful not to make it overly garish as there is a fine line to be drawn between catching the eye and going overboard.
Gradients Using Screens
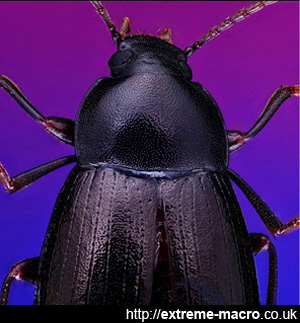
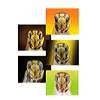
Testshot for a gradient background using a screen. Although it's difficult, expensive and time-consuming, using a screen to output a background can make for some sensational backgrounds.
Of the various ways to achieve a multicolour gradient background in extreme macro studio stacking, the one that I personally use is to shoot into a field monitor showing an Adobe Photoshop gradient.
Using Photoshop to show a gradient through a field monitor that you shoot on to means that you can have control over exactly the colour and style of gradient, and combine as many different colours as you want. It's great fun.
However, using a field monitor like this is also not without its challenges, as you're having to mix ambient and flash light. This means you're mixing colour temperatures and that can make for some very strange results. The field monitor also gets in the way, and you have to adjust your entire studio round the monitor which makes things a extremely tricky.
Other Methods
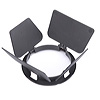
Gradients can also be achieved by using various coloured cards together, or even by using various flashes with different gels. I found using cards much more successful than using gels. The technique couldn't be simpler, obtain several colours of cards and use a paperclip to put a strip of one colour next to a strip of another. Then use macro's limited depth of field to your advantage and have those as the out of focus background for your shot.
The Photoshop Gradient
Of course, there's also a way to do it in post processing, which I personally consider cheating but still it can make for fine results. If I were to try this I would use a bluescreening technique - ie take the extreme macro against a uniform blue or grey screen then you can use blending modes in photoshop. If using a selection, stroking the path with the desaturate tool can help.
The Field Gradient
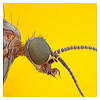
The gradient in the extreme macro field shot The gradient in the extreme macro field shot separates the men from the boys separates the men from the boys. By balancing your flash and ambient, you can let the background become the gradient for your field shot, which can act as a great visual bridge between your subject and the biology. Spring shots of butterflies benefit greatly from a vibrant green or yellow gradient; control the gradation and colour of these by your f/stop and the amount of relative distance between your subject and your background.
Shooting For The Background
There is quite an interesting exercise that you can do, which will take you about 20 minutes but should help you get nice gradients out in the field. Do some practice shots just to get a nice out of focus gradient in the background, using the sky, tinfoil reflection, brightly coloured flowers or some nice greens. Get the background absolutely right and completely ignore the foreground. Then, and only once the background is completely right, worry about the foreground, and put something that's middle colour value where you might typically take an extreme macro. Then, gradually bring up manual fill in flash at low settings until the foreground is exposed nicely as well. This will give you some nice settings to use when you finally see that insect you've been looking for. I call this shooting for background and filling the foreground.
Related Articles