Mounting Insects
by Johan J Ingles-Le Nobel
Last updated August 31, 2017
One of the challenges that we face in extreme macro studio photography is mounting insects nicely for photography, and there are really no two ways about it other than to use the techniques that entomologists use for pinning insects.

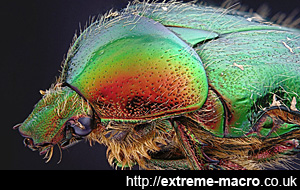
Matted hair on a mounted insect, the bane of my life. Nobody seems to have a solution to hair matting. If you have one, boy I'd love to hear it from you.
Mounting insects nicely is a big deal in my personal workflow because I shoot horizontally and use a field monitor to make the background so don't want anything nasty showing in the final image like a horrible out of focus setting pin. Or, even worse, an in focus setting pin.
It's A Process
Much like many other things in extreme macro, I consider mounting an insect very much a process with separate stages each of worth take some time and effort to get right. For me, having a nicely mounted specimen starts with the means used to still the specimen as some methods will mess up your specimen before you even start. For example, freezing insects maybe the easiest of the methods but great care has to be taken because limbs become very brittle and break in a frozen state. But having stilled the insect successfully, it all kicks off with the cleaning of the specimen.
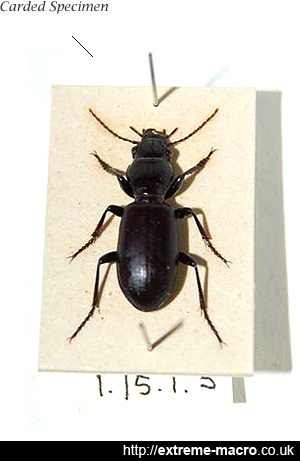
Carded insect, providing a nice pose to subsequently take a stack. I personally find insect carding the hardest but also potentially the most enhancing of stages in the whole insect preparation process.
Cleaning
Cleaning is a fiddly, tricky chore and both chemical and mechanical aids can be bought to make insect cleaning easier. I have had some success with an ultrasonic bath, but the humble old lens blower is great for getting off bits of dirt as well and there are various chemicals which purportedly help with hair clumping although I've sadly had little joy myself.
Relaxing, Carding and Pinning
Having cleaned the specimen I'll relax it, which is a process used to loosen muscles so that a specimen can then be arranged into the right position. Relaxing is followed by spreading and carding, and then the specimen is finally pinned into position for photography.
Positioning Gear
Of course after that you obviously need to have the right equipment to be able to adjust the height and orientation of the specimen and there are various extreme macro stages that I use for this, but in particular my universal stage thing is a lot of help with this.
Specimen Preparation Walkthrough
1 ➤ The specimen preparation workflow
2 ➤ How to clean preserved specimens
3 ➤ How to relax specimens for spreading
4 ➤ How to make spread specimens for setting
5 ➤ How to cure dehydrated eyes
6 ➤ How to dry a cured specimen fast
7a ➤ How to pin a cured specimen, or...
7b ➤ How to card a cured specimen
Other reading: focus stacking walkthrough
Some other tools that I use are also worth recommending. The first of these is a strip of rubber, cut from a small rubber erasor. A thin 5mm x 10mm x 10cm strip is a great way to hold down a small insect body without damaging it if you're careful, so that you can put a pin into the body to mount it for photography. A second tool is one I made myself, using two metal wires. By twisting them together and leaving open a V at the end, and putting the other end into a cheap wooden handle, it gives you a good implement to hold down a bug much in the same way that you might pin down a snake. Lastly, the humble stereo microscope. A cheap one will do because you're not using it for its great optical quality, but as a device to see what you're doing when trying to stick a pin into something small it is invaluable.
Other Alternatives
People I know use all sorts of things and you absolutely don't have to use pins if you don't want to. The folk I know use Plasticine, pipe cleaners, a hypothermic needle, a small ball and socket head intended for small cameras, headless insect pin and pin the bug about 1/2 way through the body. Other techniques that I've seen used by people for tiny insects includes double sided sticky tape on the lower body or wings, or a dot of glue on a cover slip... there are no rules: whatever is handy and works for you!
Related Articles


